These Chocolate Croissants are light, flaky, buttery croissants with a deliciously rich dark chocolate center—a perfect treat for any chocolate lover.

I love pastries; they are the one thing I miss about visiting the East Coast. Boston was one of my favorite places to eat my favorite chocolate croissant. There are a couple of places here in town that have descent croissants but after some big disappointments I ventured off to try my own. I came across this recipe of course on Pinterest. It was a lot easier than a few other recipes I attempted.
There are a few key things to make this a pastry success. One, patience. Two, buy good dark chocolate, it is not a time to go cheap. If you are going to take this much time to make something you don’t want the chocolate to ruin it. If you are in a bind get Ghirardelli’s from the store. Three, BUY good butter!!! I personally like Challenge Butter brand.
This recipe doesn’t take a ton of work it just takes some time. Overall you aren’t working the entire time you are just waiting. Hence the patience. You will be so happy with this recipe and the reward of the sweet and chocolaty center, buttery layers and a crisp, flaky outer crust. It is well worth the wait!
Enjoy! XOXO San
How do you make Chocolate Croissants
-
In a medium bowl, whisk 2 3/4 cups of the flour with the yeast, sugar, and salt. Add the milk to the bowl of a stand mixer fitted with the dough hook. Add the dry ingredients and turn to the mixer to low, beating until the dough comes together in a rough ball, about 4 minutes.
-
Add the pieces of butter and continue kneading until the butter is completely incorporated, about 5-6 minutes. The dough will still be sticky but should form a rough ball and mostly clear the sides of the bowl (if you make bread regularly, this dough will be stickier than you’re used to and won’t clear the sides of the bowl as fully as a typical yeast bread). If it’s too sticky, add the remaining 1/4 cup of flour, 1 tablespoon at a time.
-
Wrap and refrigerate for 1 hour.
-
Place the pieces of butter on your work surface and sprinkle the flour over the top of them.
-
Use a bench scraper to smear the butter/flour mixture back and forth against the work surface.
-
Continue until the mixture is uniform and smooth. Gather in a piece of plastic wrap and shape into a 7-inch square.
-
Refrigerate for at least 30 minutes.

-
Place the dough on a lightly floured work surface. Roll into an 11-inch square, lifting and turning as you go to make sure the dough isn’t sticking. Place the chilled butter square diagonally in the center of the dough.
-
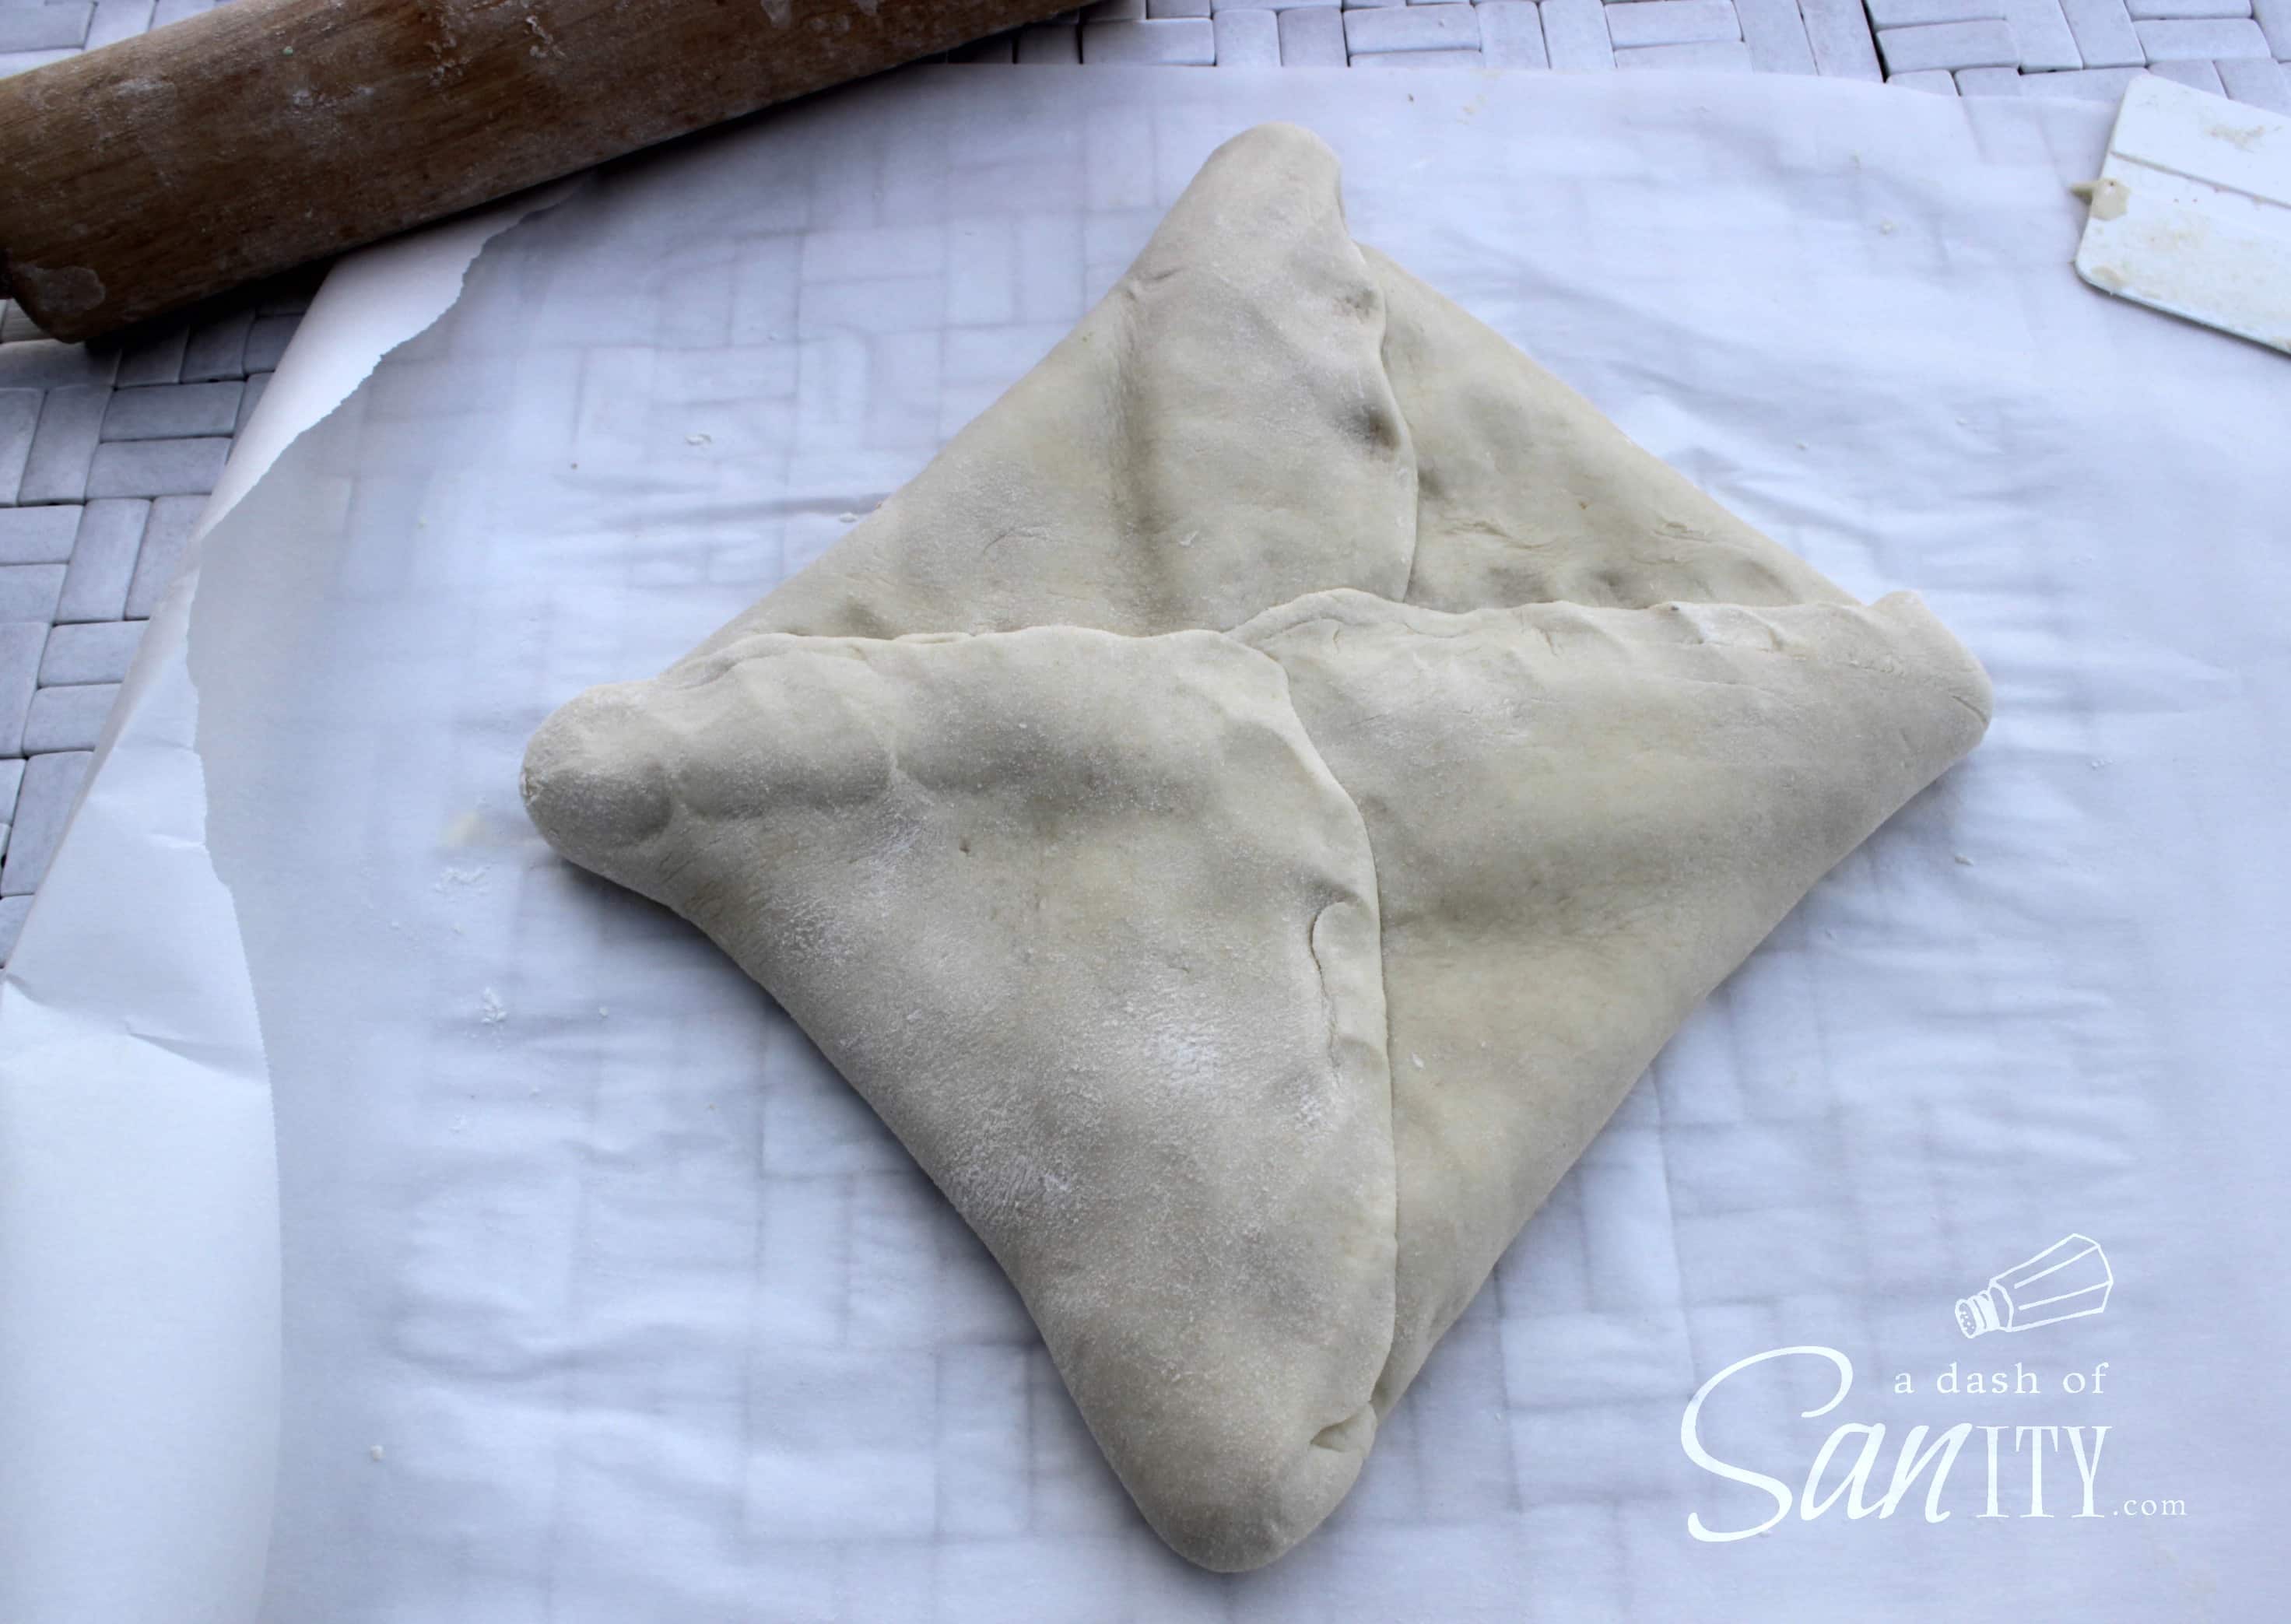
Lift each of the four corners of the dough up and over the butter square.

-
It’s fine if they don’t meet exactly, just pinch them together to seal completely.
-
Use your rolling pin to gently tap the dough, starting in the center and going outward, until square gets larger and the butter begins to soften slightly. Roll the dough into a 14-inch square, flouring your work surface and rolling pin as necessary to ensure the dough isn’t sticking.

-
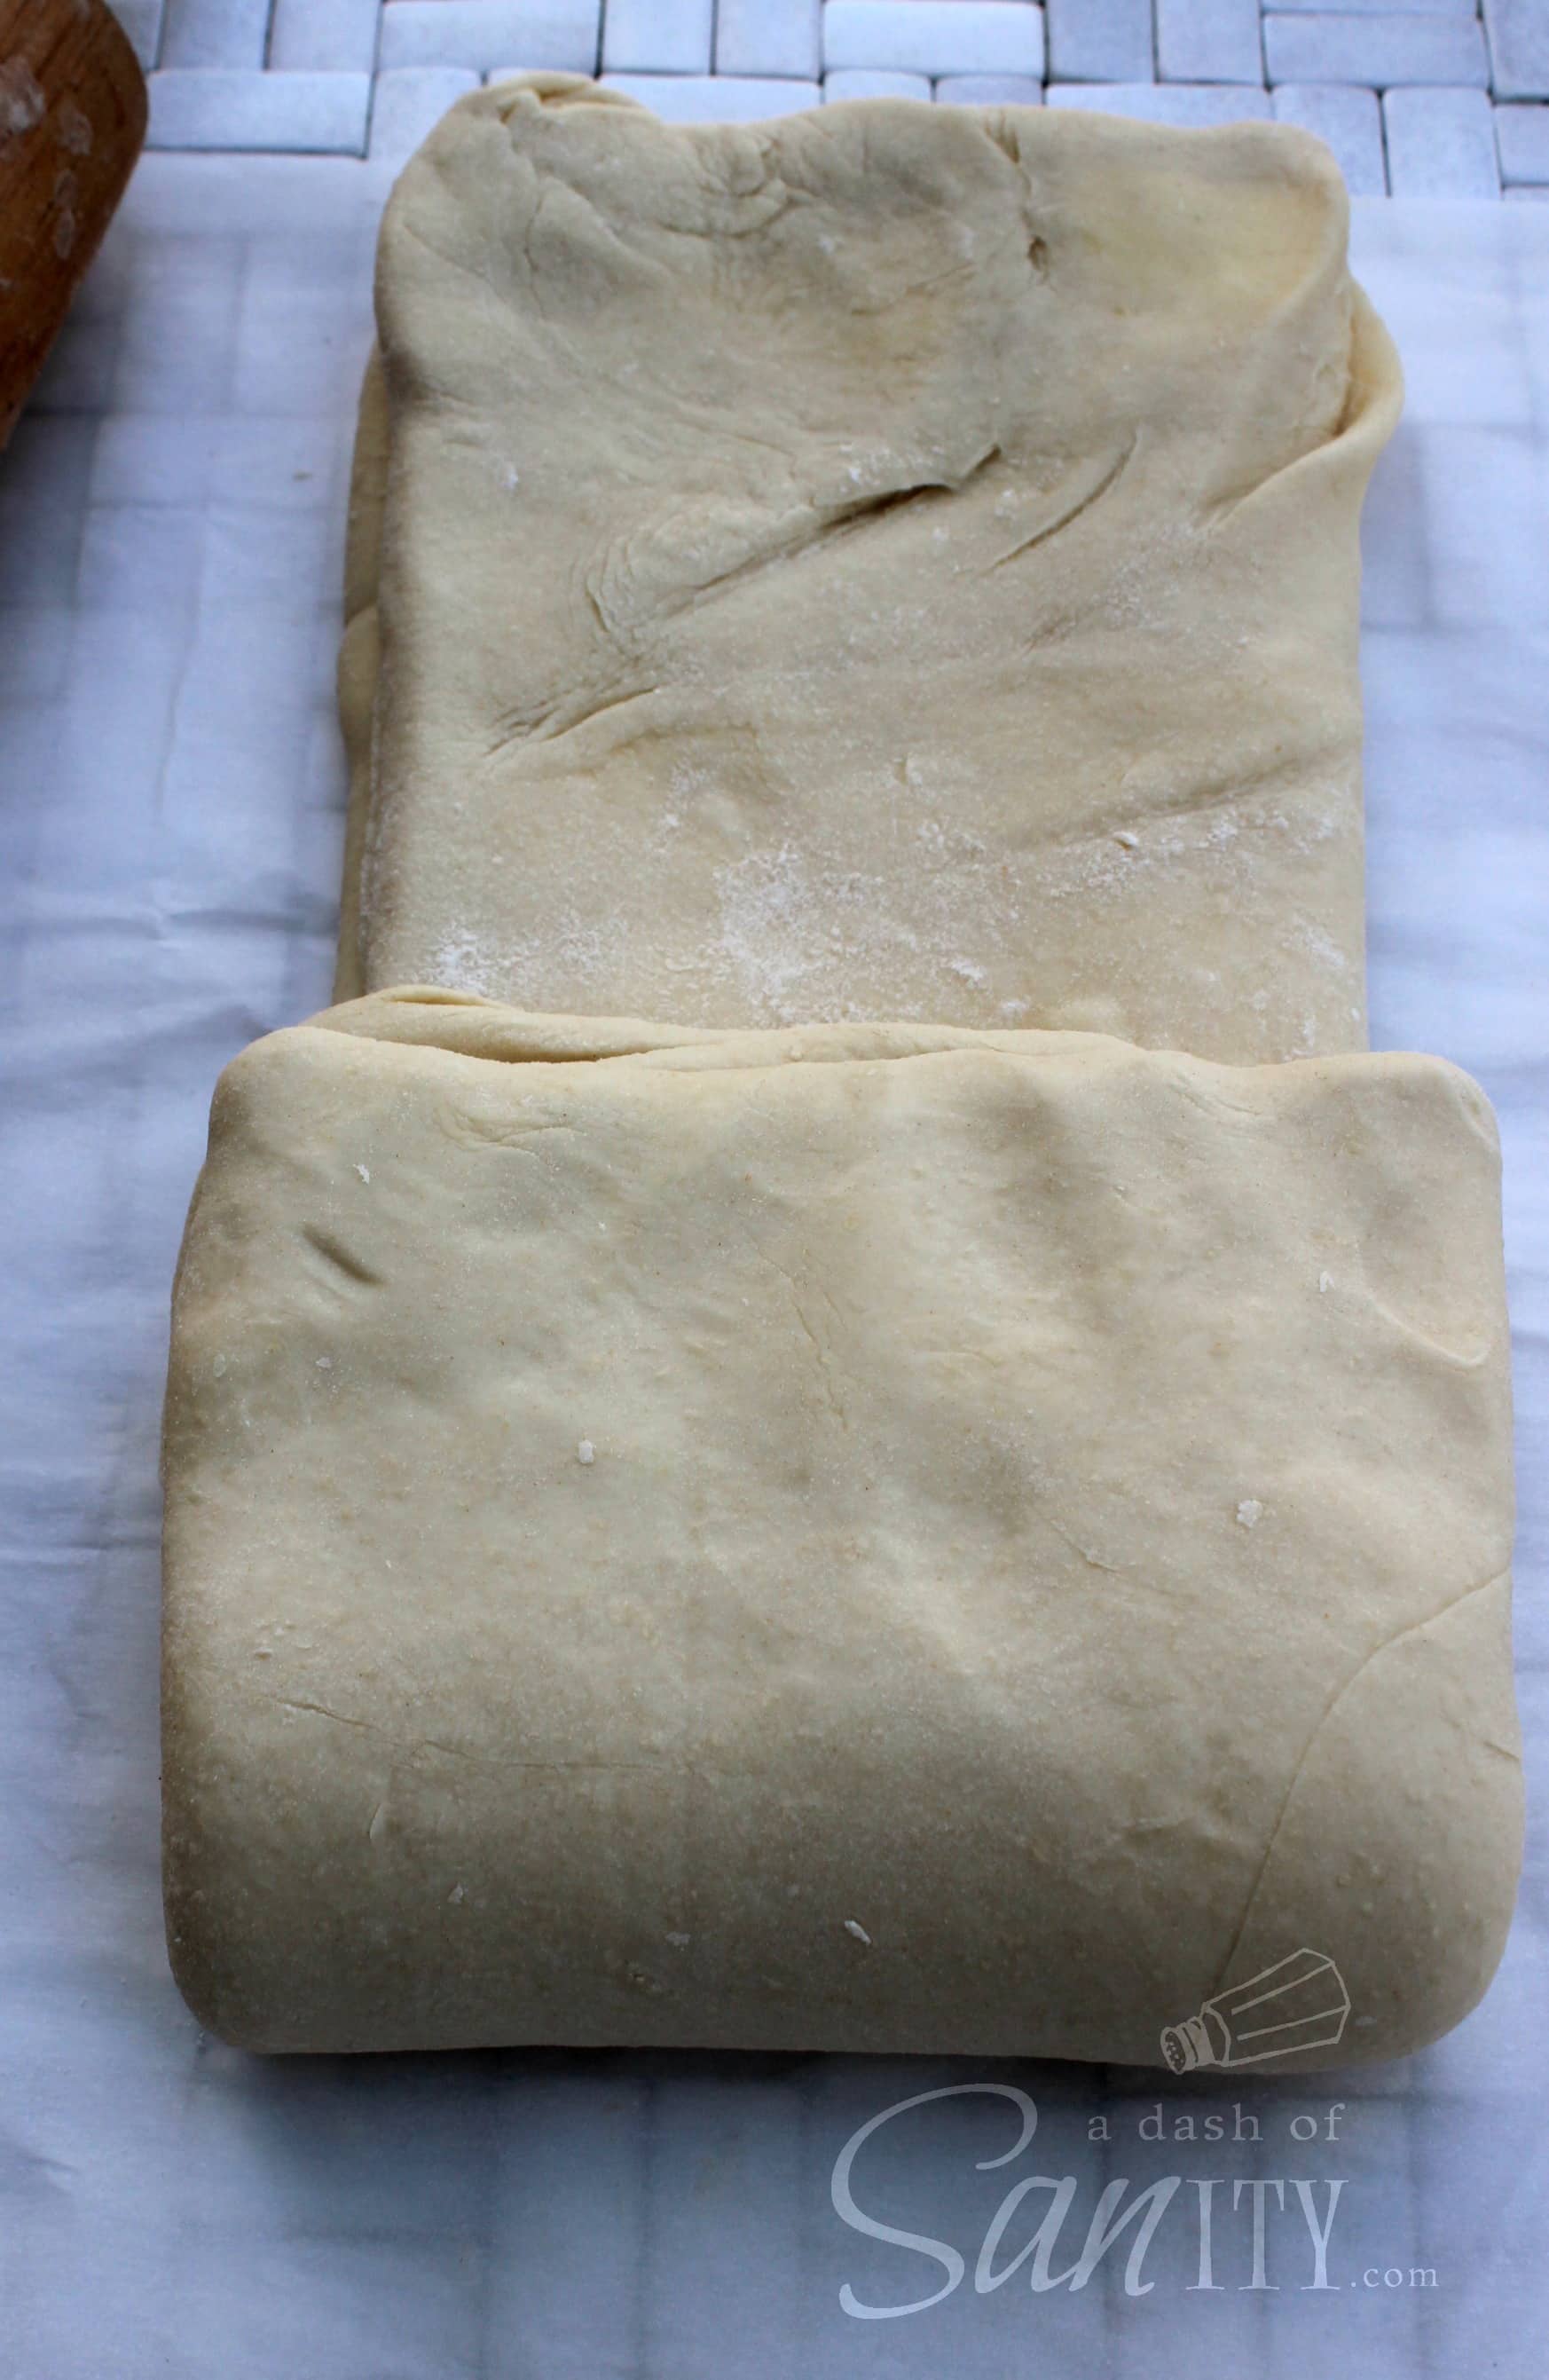
Fold one side of the dough to the center and then bring the other side up and over it – basically, you’re folding the dough like you would a business letter. This is also called a “turn” of the dough.

-
Complete a second turn by folding the top half of the dough down to the center and then bringing the bottom up and over it.

-
Wrap the dough in plastic and refrigerate for 2 hours.
-
Repeat the process above (roll into a 14-inch square and fold like a business letter twice) to complete 2 more turns of the dough. Again, wrap in plastic and refrigerate for 2 hours.
-
Line two baking sheets with parchment paper. Place the dough on a lightly floured work surface, and roll into a 20-inch square (flour as necessary to make sure it’s not sticking). Cut the dough into 4 equal 10-inch squares.
-
Cut each of those squares into 3 rectangles (about 10 x 3 1/4-inches each) – you should have a total of 12 rectangles.
-
Add about 1 tablespoon (about 1/2-oz) of chopped chocolate to the center of each rectangle.
-
Fold the top of the rectangle over the chocolate and down to the center, then lift the bottom up and over it (again, we’re folding it like it’s a business letter). I like to pinch the seam together so that it doesn’t roll out too much.
-
Transfer to the prepared baking sheets, seam-side down. Try to keep the croissants horizontal as you move them so the chocolate doesn’t spill out the sides.
-
Loosely cover the croissant with plastic wrap, you can spray this with some cooking spray to keep from sticking but I rarely do this. Let them rise at room temperature for 45-60 minutes, or until they’re puffy (they won’t necessarily double in size). While they’re rising, preheat oven to 400 F with racks in the top and bottom thirds of the oven.
-
Brush the croissants with the egg wash then bake for 18-22 minutes, or until they are golden brown, rotating the baking sheets from top to bottom and front to back at the halfway point. Transfer the baking sheets to wire racks and let the croissants cool for at least 20 minutes before serving. They’re best warm, but will keep for a few days at room temperature if tightly wrapped. To bring back the fresh taste, zap in the microwave for 12-15 and enjoy it warm.
-
Makes 12 croissants. I sometimes get 16 out of the batch when I make them a little smaller.
My favorite kitchen tools used to make Chocolate Croissants
This post may contain affiliate links. See my Full Disclosure for further details.
SHEET PAN: I love using a larger sheet pan while cooking because I am feeding my family of seven. I love these pans so much that I have 9!
MIXING BOWLS: I love having a variety of sizes of mixing bowls. From small to large, I find that having at least 3 bowls of different sizes has been essential in my kitchen. I prefer Pyrex because of the durability.
MEASURING CUPS: Nothing beats a good set of measuring cups that last a long time. I love metal measuring cups because of their durability.
MEASURING SPOONS: I have to have a metal set of measuring spoons on hand. The plastic ones just don’t last long in our house thanks in large part to the garbage disposal.
Don’t forget to pin this to your favorite Pinterest board to save for later!
Chocolate Croissants

Ingredients
Dough
- 3 cups all-purpose flour, plus extra for rolling
- 1 tablespoon instant yeast
- 1/4 cup sugar
- 1 1/4 teaspoons salt
- 1 1/4 cups cold whole milk
- 2 tablespoons unsalted butter cut into 1/2-inch pieces
Butter Square
- 1 1/2 cups unsalted butter cold, cut into 1-inch pieces
- 2 tablespoons all-purpose flour
Chocolate Center
- 8 ounces bittersweet chocolate finely chopped
- 1 large egg lightly beaten (for egg wash)
Instructions
- In a medium bowl, whisk 2 3/4 cups of the flour with the yeast, sugar, and salt. Add the milk to the bowl of a stand mixer fitted with the dough hook. Add the dry ingredients and turn to the mixer to low, beating until the dough comes together in a rough ball, about 4 minutes.
- Add the pieces of butter and continue kneading until the butter is completely incorporated, about 5-6 minutes. The dough will still be sticky but should form a rough ball and mostly clear the sides of the bowl (if you make bread regularly, this dough will be stickier than you’re used to and won’t clear the sides of the bowl as fully as a typical yeast bread). If it’s too sticky, add the remaining 1/4 cup of flour, 1 tablespoon at a time.
- Wrap and refrigerate for 1 hour.
- Place the pieces of butter on your work surface and sprinkle the flour over the top of them.
- Use a bench scraper to smear the butter/flour mixture back and forth against the work surface.
- Continue until the mixture is uniform and smooth. Gather in a piece of plastic wrap and shape into a 7-inch square.
- Refrigerate for at least 30 minutes.
- Place the dough on a lightly floured work surface. Roll into an 11-inch square, lifting and turning as you go to make sure the dough isn’t sticking. Place the chilled butter square diagonally in the center of the dough.
- Lift each of the four corners of the dough up and over the butter square.
- It’s fine if they don’t meet exactly, just pinch them together to seal completely.
- Use your rolling pin to gently tap the dough, starting in the center and going outward, until square gets larger and the butter begins to soften slightly. Roll the dough into a 14-inch square, flouring your work surface and rolling pin as necessary to ensure the dough isn’t sticking.
- Fold one side of the dough to the center and then bring the other side up and over it – basically, you’re folding the dough like you would a business letter. This is also called a “turn” of the dough.
- Complete a second turn by folding the top half of the dough down to the center and then bringing the bottom up and over it.
- Wrap the dough in plastic and refrigerate for 2 hours.
- Repeat the process above (roll into a 14-inch square and fold like a business letter twice) to complete 2 more turns of the dough. Again, wrap in plastic and refrigerate for 2 hours.
- Line two baking sheets with parchment paper. Place the dough on a lightly floured work surface, and roll into a 20-inch square (flour as necessary to make sure it’s not sticking). Cut the dough into 4 equal 10-inch squares.
- Cut each of those squares into 3 rectangles (about 10 x 3 1/4-inches each) – you should have a total of 12 rectangles.
- Add about 1 tablespoon (about 1/2-oz) of chopped chocolate to the center of each rectangle.
- Fold the top of the rectangle over the chocolate and down to the center, then lift the bottom up and over it (again, we’re folding it like it’s a business letter). I like to pinch the seam together so that it doesn’t roll out too much.
- Transfer to the prepared baking sheets, seam-side down. Try to keep the croissants horizontal as you move them so the chocolate doesn’t spill out the sides.
- Loosely cover the croissant with plastic wrap, you can spray this with some cooking spray to keep from sticking but I rarely do this. Let them rise at room temperature for 45-60 minutes, or until they’re puffy (they won’t necessarily double in size). While they’re rising, preheat oven to 400 F with racks in the top and bottom thirds of the oven.
- Brush the croissants with the egg wash then bake for 18-22 minutes, or until they are golden brown, rotating the baking sheets from top to bottom and front to back at the halfway point. Transfer the baking sheets to wire racks and let the croissants cool for at least 20 minutes before serving. They’re best warm, but will keep for a few days at room temperature if tightly wrapped. To bring back the fresh taste, zap in the microwave for 12-15 and enjoy it warm.
- Makes 12 croissants. I sometimes get 16 out of the batch when I make them a little smaller.
Notes

My review: I am in love with these chocolate croissants. So is my husband who will eat the entire batch in one day if I let him. I try to down one or two (lol, seriously I do) before he finds out they are out of the oven.
Kid’s reviews: My husband and I love these so much it is hard for us to share. But after I am in a chocolate croissant haze I usually cave. They love them. My son Aiden says they are better that what he has had at the store…umm…thanks.
Hope your family enjoys these as much as our family has.


Oh I just found these at the Dedicated House party and they look fabulous. What a wonderful thing to make on a cold wintery day!
Hi Sandra, the croissants drew me to you, I love them. I’m not sure I could make them but I’m going to try. I added you as a g+ friend. Thanks for sharing, I’m pinning.
Oh so yum! Have pinned to my Food and Drinks to Make board.
Holy crap these look good.
Wow, thanks! xo San
Hi Sandra,
I don’t know if my previous post went through or not. I am planning on making these for a mid-morning baby shower. Instead of getting up super early in the morning, I wondered if I could make the dough and fill it with the chocolate and then store it in the fridge overnight. Then, allow it to come to room temperature, rise for the allotted 45-60 minutes and then bake. Thanks!
So happy these turned out girl, I am glad I was able to help answer your questions. What a great friend you are. xo San
It’s so yummy